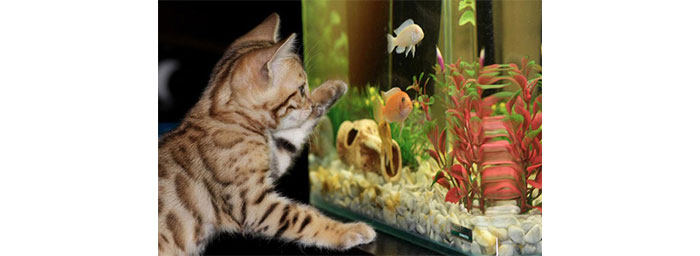
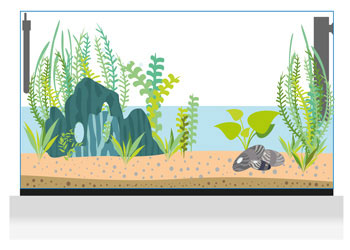
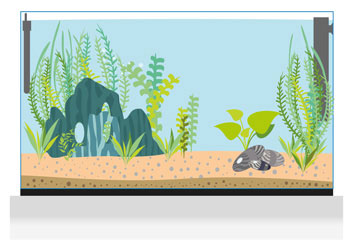
Our other guides (click on the thumbnail)
Before installation
How to choose an aquarium?
First, it will be a question of budget. The higher the volume, the more expensive the technical equipment, including the tank. It must also be reminded that the larger the aquarium, the more substrate and plants are needed. It will also be more expensive for its animal population (you have to buy more fish, or larger species that are more expensive). Also added are the maintenance costs (electricity consumption, water changes...) which can also vary according to the size of the tank. One of the first criteria will be the budget you want to invest in your aquarium. We recommend that you set your budget before any purchase!
Then, even if it sounds silly, the place that will take the aquarium in the room must be considered. We understand that putting a 360 liter (79 imp gal / 95 US gal) aquarium in a 25 m2 (270 ft2) room is not the ideal choice! It is generally accepted that a 96 liter (21 imp gal / 25 US gal) aquarium is suitable for a room of less than 10 m2 (110 ft2).
Finally, the weight of an aquarium can be taken into account. Indeed, a 360 liter (79 imp gal / 95 US gal) aquarium does not weight 360 kg (800 pounds)! We must add the tank’s weight, the furniture, the substrate... Generally, you can multiply the volume of your aquarium by 1.5 to have its approximate weight. So, a 260 liter (57 imp gal / 67 US gal) aquarium will weigh nearly 390 kg (860 pounds)! In new buildings, the risk is limited, but in older buildings the installation of aquariums of more than 250-300 liter (55-66 imp gal / 66-79 US gal) is more dangerous.
It is recommended for aquarium beginners not to start below 120 liter (26 imp gal / 32 US gal). Indeed, the greater the volume, the more the gaps and maintenance errors will be well tolerated by the ecosystem. 120 liter (26 imp gal / 32 US gal) is therefore a reasonable volume in terms of cost while minimising possible errors.
General advice
Where to put my aquarium?
Choose a safe place in your home. For example, you do not want to constantly bang against your aquarium, so watch out for the corners! A recess will be the perfect place.
You will also have to pay attention to the water on your beautiful carpet, or the handling of hazardous chairs that can break the glass of the aquarium. Also put your tank out of reach of unattended children or unruly animals.
Make sure your fish are safe!
Make sure that the electrical cables are well arranged so that your feet do not get caught, or in order to not attract the attention of young children or animals.
Also remember that you will have to change the water regularly, so the aquarium should not be too far from the taps!
Finally, the aquarium should not be directly exposed to sunlight as this could lead to algae problems. Also avoid sticking it against the radiator.
Acquiring a used aquarium?
You should know that when the tank is empty, the joints dry and become porous. This will enormously weaken the aquarium and you risk breaking it quickly. So, if you buy a used aquarium, make sure that it has remained with water inside (you can of course empty it to move it, as long as it remains empty for a short time, so as to not damage the joints).
In addition, learn about the life of the aquarium. For example, has it already had microbial or parasitic problems? What is the state of the electrical equipment? These few precautions will help you avoid many problems.
Remember that you have no guarantee or recourse, that's why we advise you a to opt for a new one.
Have you thought about insuring your aquarium?
It may be useful to insure your aquarium, for example in case of breakage or leakage. Indeed, the damage caused by the leakage of a 300 liter (66 imp gal / 79 US gal) aquarium can be quite important on the electricity, the floor or the walls... Some insurances cover your aquarium up to 300 liter (66 imp gal / 79 US gal) automatically, whereas with other insurances it is necessary to report it. Some companies will charge you extra. Make sure to ask your insurer!
Technical equipment
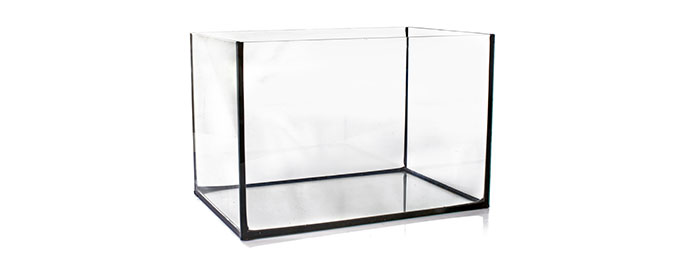
The tank
The aquarium tanks come in many sizes and shapes. This can range from small 5 liter (1 imp gal / 1.3 US gal) to huge 5000 liter (1100 imp gal / 1320 US gal) or more. So how to choose your tank?
Equipped tank or bare tank?
First, you can buy your tank in 2 different ways: either a bare tank or an equipped tank. The purchase of a bare tank offers the possibility to arrange it as you wish (allows the installation of an external filter for example). It can also replace the damaged tank of an already equipped aquarium. Other tanks are sold with an internal filter, heating, lighting, etc... a good solution to start well!
A bare tank will be ideal if you want to choose your equipment yourself!
What shape for your aquarium tank?
The rectangular tanks are the most popular. They have a large water / air contact surface, which is optimal for gas exchange (better oxygenation). As these tanks are shallow, they are also easier to maintain. As for the comfort of the fish, a rectangular tank will also be a good choice: they offer a good length for swimming. Finally, as this is the most common tank shape, they are easy to find in all sizes and they are the most affordable.
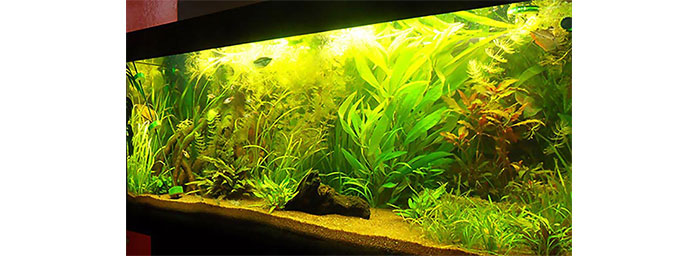
Rectangular aquariums are the most common and offer many possibilities: color, size, equipment...
With the appearance of nano-aquariums, cubic tanks are also more and more present in store shelves. This form is more original and (in the eyes of some) more aesthetic. The cube shape is perfect for small aquariums of 10 liters (2.2 imp gal / 2.6 US gal), 20 liters (4.4 imp gal / 5.3 US gal) or 30 liters (6.6 imp gal / 8 US gal). It should be noted that, with some exceptions, this form of tank is rather reserved for the maintenance of invertebrates (such as shrimp) than fish, which will feel quickly cramped!
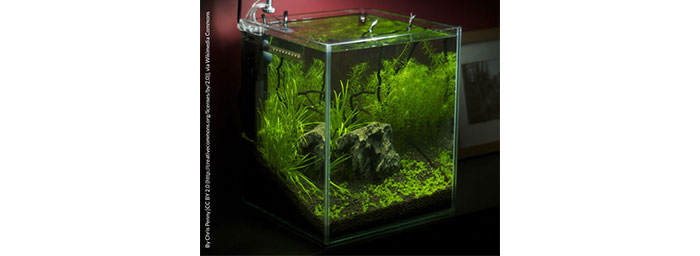
Cubic aquariums are particularly well suited to nano-aquariums!
The angle tanks, or triangular have the advantage of integrating perfectly in our interiors. They dress nicely our angles and allow a saving of place. This special form will however require the fish to swim almost exclusively on the front of the aquarium, since the length of the tank decreases very quickly towards the rear. The filter can also be difficult to access in some configurations (when installed at the back of the tank, in the corner). This form of tank is more expensive.
There are also cylindrical. aquariums. Even if their aesthetic appeal is certain, these aquariums have many disadvantages. To begin, never put fish in these aquariums, because a fish swims to the front and not round! It will be a torture for your fish to find itself in a cylindrical aquarium. Installation of the filter and lighting is more difficult, as well as routine maintenance (especially for window cleaning).
Finally, the jar should be avoided completely! (Moreover, in some countries, this kind of aquarium is now forbidden). It lacks everything in this aquarium (if we can call it an aquarium...): the filter, heating, surface contact water/air very very low, round shape completely unsuitable for fish. In short, no fish should ever be sentenced to death in this kind of container! The goldfish will live much better in an aquarium of at least 150 liter (33 imp gal / 40 US gal), or even better: in an outdoor pool!
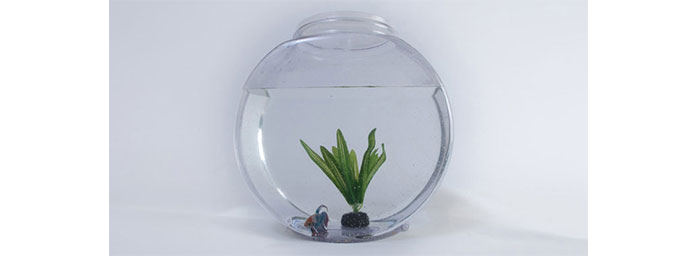
Jars are not aquariums and should never contain fish!
The furniture
You do not have to buy a specific piece of furniture for your aquarium. You can install your tank on a flat and straight piece of furniture, perfectly clean, smooth and able to support the weight of the full tank (for this last point, see the subtitle "How to choose your aquarium?"). If you do not have this type of furniture or if you have doubts about its strength, there are many furniture dedicated in stores. Their advantages are many: they are designed to highlight your tank, withstand splashing during maintenance, they have storage and holes for the passage of cables...
Whatever your choice of furniture, the tank MUST NEVER EXCEED the support on which it is installed! The support must also be as straight as possible so that the tray is leveled. If this is not the case and the inclination is too great, one of the sides of the aquarium will bear extra effort because of the slope and could be weakened.
Always install a foam mat between your furniture and the tank. This will protect the bottom of the aquarium from the irregularities of your furniture and avoid the tensions of the glass (even a single grain of sand between your furniture and your tank may eventually cause tension and crack the glass of your tank).
The filter
The filter is one of the key elements of your aquarium: it will clean the water of different types of waste and ensure a degradation of organic matter (decaying leaves, food remains, fish excrement...). It will be a great ally to maintain good water quality in your aquarium, but will never replace regular water changes.
Before considering the possible types of filtration for your aquarium, it is worth remembering the different types of filtration:
- Mechanical filtration: this is the system allowing the retention of solids in the filter. However, this waste is always part of the system until cleaning or replacing the filter (as the dust pushed under the carpet is still part of the house!). For this type of filtration, the most commonly used materials are wadding (for fine waste), plastic foam (blue or green for larger waste), gravel or sand.
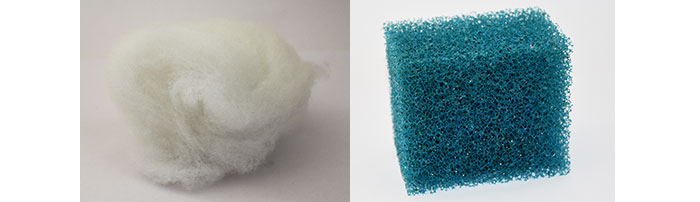
Mechanical filtration: the filter media retain more or less large waste
- Chemical filtration: as its name suggests, it will change the chemistry of the water. For example, peat or limestone will change the pH. The resins will fight against nitrates, phosphates or silicates... Activated carbon or zeolite will eliminate carbon dioxide and ammonia

Chemical filtration: activated carbon
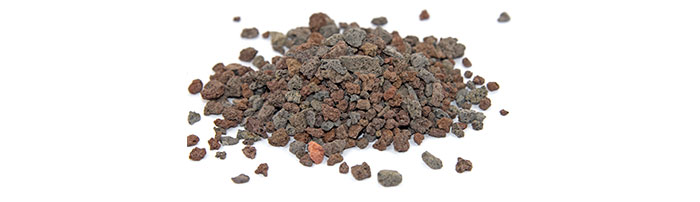
- Biological filtration: it will increase the bacterial population that guarantees a good nitrogen cycle (elimination of organic waste) and clean water. Biological filtration offers favorable supports for bacterial colonies, such as ceramics, plastic (bio-balls), and glass or clay balls.
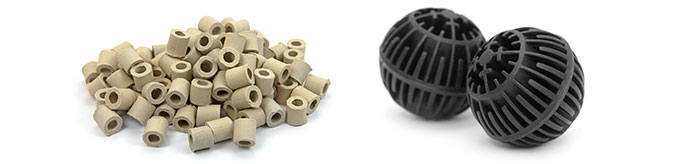
Biological filtration: ceramic noodles or bio-balls make excellent bacterial carriers
You will find in all the filters a mechanical and biological filtration. Chemical filtration is optional.
Power side, it is accepted that you should opt for a filter whose flow is equal to the volume of the aquarium multiplied by 3 or 4 or 5 (it will depend on your population). Thus, for a 120 liter (26 imp gal or 32 US gal) aquarium, choose a filter whose pump has a flow between 360 liters/hour (79 imp gal/hour or 95 US gal/hour) and 600 liters/hour (132 imp gal/hour or 158 US gal/hour).
Let's get into the heart of the matter: there are 5 kinds of filters for freshwater aquariums:
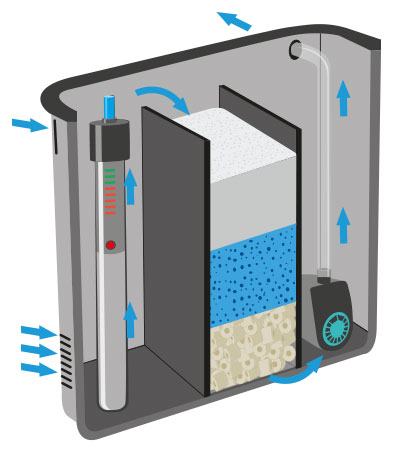
Internal and external filters: rotary pump filters
Rotary pump filters consist of two elements: a compartment where the filter media are placed and a pump to suck the water. They combine mechanical and biological filtration, chemical filtration being optional.
When these filters are internal to the aquarium, it is generally referred to as a settling filter (the decant being in this context the compartmentalised "box" receiving the filter media and the pump). They have slots in the first compartment for the water to enter the filter. A discharge pipe is connected to the pump to ensure the water outlet in the aquarium. Very often, this type of filter also includes a first compartment where the heating system is installed (there are then three compartments: heating, filtering mass and pump). This type of filter is suitable for medium-sized aquariums (between 60 liters / 13 imp gal / 16 US gal and 200 liters / 44 imp gal / 53 US gal) that do not require particularly powerful filtration.
The operation of a settling filter
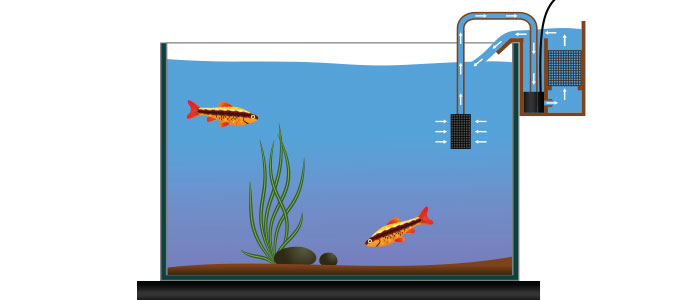
This type of compartmentalised filter can also be external. They are then connected to the aquarium at the entrance and exit by pipes. This type of filter is more powerful than the previous ones. You will be able to install it on aquariums of more than 200 liters (44 imp gal / 53 US gal) or if you maintain particularly polluting fish (like the cichlids for example) or requiring a strong mixing (for example the fish Gastromyzon). The external filter is also more discreet, easier to maintain and does not take up space in the tank. Surely one of the best choices in the category!
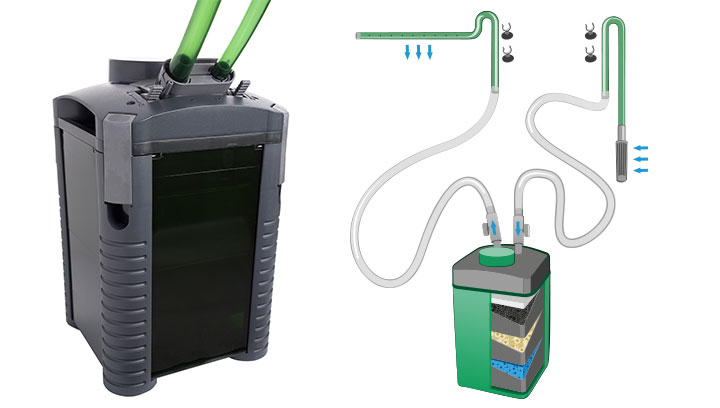
The external filter and its operation
Sand filters
These filters do not have a filtering mass. They consist of a perforated plastic plate placed between the bottom of the aquarium and the substrate. This plate will be elevated about 2 cm or 0.8 inches from the bottom of the tank. This system can be completed by an enhancer, a waterfall filter, or an air pump.
The water is sucked through the substrate and exits through the exhausters or filters. The substrate then acts as a filtering mass, both mechanical and biological (sometimes even chemical). For greater efficiency, provide a substrate layer between 75 and 80 mm. Obviously, the substrate must not be able to pass through holes in the grid (particle size between 3 and 5 mm).
This type of filtration has advantages: the arrival of water is done on the entire surface of the soil and therefore no place in the aquarium escapes filtration. The large filter surface available also promotes the development of bacterial colonies. This filter does not take up space in the aquarium.
On the other hand, if the filter engorges, its cleaning will imply a major upheaval of the aquarium. It should be noted that the efficiency of this type of installation is relatively low compared to other systems such as rotary pump filters. In addition, the substrate will require regular cleaning since it will retain the waste (mechanical filtration). It will therefore be used for small aquariums or for certain paludarium configurations. Because of these disadvantages, this type of filtration is increasingly rare nowadays.
Example of filter substrate
Compact internal filters
This is a small internal filter to the aquarium. Although its cost is very affordable, its effectiveness is limited. Indeed, the filters are quite small which makes it quickly ineffective. The maintenance of this type of filter should be done regularly. It will therefore be used for small aquariums like nano-aquariums and for aquariums up to 100 liters (22 imp gal / 26 US gal) for larger models.

Example of a compact internal filter
Waterfall or suspended filters
The basic principle is the same as for the compact filter but as an improved version: it is positioned outside the aquarium (hanging from the wall) thus providing more space in the tank. It is also slightly larger than the compact filter which increases its efficiency (the filter media are larger). This type of filtration is also quite efficient with the oxygenation of the water because its rejection is "cascading" and thus strongly beating the surface. Attention, this can however cause noise. Just like the compact internal filter, waterfall filters are for small aquariums.
How a waterfall filter works
Runoff filters
Also called "semi-wet" or "dry-wet" filter, this type of filtration is more complex to achieve but offers the best efficiency. It is therefore a qualified outdoor filter "overflow" and can be used in both freshwater and seawater.
It requires the establishment of a secondary tank, usually located under the main aquarium.
Thanks to a drawer system, some of the filter media can be in the open air. The water passes through these masses in the form of rain, by runoff. Thus, water / air gas exchange is optimal when water enters the filter media, which promotes the increase and over activity of denitrifying bacteria. This additional aquarium will also be more convenient to set up the heating, refrigeration, the electronic control unit or the skimmer for reef aquariums.
This system is rather reserved for expert aquarists for large tanks (more than 600 liters / 132 imp gal / 158 US gal) technically sophisticated.
There are other types of filtration that we will not detail because they are obsolete or rarely used: the natural filtration plant or the gutter filter.
Lightning
Our fish are always more beautiful in the light of day, it's a fact. But this source of light is difficult to control! So even if your aquarium is beautifully exposed, you still have to use a lighting system. You have several possibilities for this. Your choice will have to take into account your fish (some fishes like a dim lighting, others rather intense...), the requirements of the plants, the height and the length of your aquarium. Be that as it may, you must always buy equipment specially designed for the aquarist (waterproofness, light spectra...)!
But before seeing the different lighting solutions, let's talk about science!
So that this article does not completely turn into a scientific journal, we have chosen to stop on three parameters to help you choose your lighting: power, colour rendering index and colour temperature.
The lighting power is expressed in Watts. This is the power consumption needed to produce light. In a very general way, we will be able to count 1 Watt for 2 liters (0.5 Gal) of water.
But if you want to be more specific, evaluate the power of lighting in Lumens. In this case, it will take between20 and 35 Lumens per liter (0.25 Gal) of water.
The colour rendering index, or CRI,measures the efficiency with which a light source will reproduce the different colours of the light spectrum. This is a number between 0 and 100. The more the light source has an IRC close to 100, the more it will be qualitative (moreover, the daylight that serves as a reference has a CRI of 100). In general, freshwater fish keeping will always have light sources with a CRI greater than 80.
The colour temperature is expressed in degrees Kelvin (°K). This parameter indicates the dominant shade of the lighting. The lower the colour temperature, the closer you get to red. Conversely, the higher it is, the closer you get to blue. These temperatures range from 0 to 22,000°K. In aquariums, the goal is to get as close as possible to the colour temperature of natural light: 6500°K.
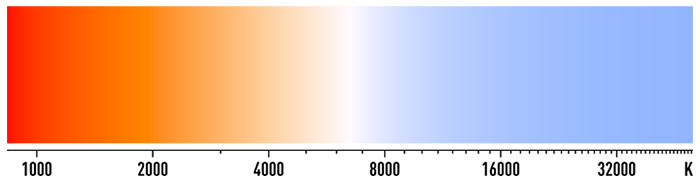
Diagram of colour temperatures (°K)
Now that these three principles are mentioned, we can switch to different types of lighting:
Fluorescent tubes
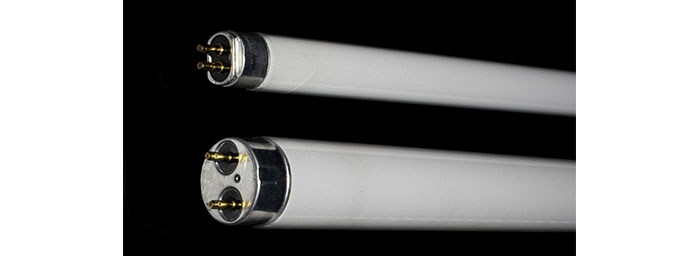
Fluorescent tubes for freshwater aquarium
Generally, they are embedded in the lid and already installed when buying a fully equipped aquarium. It is the basic lighting solution, the least expensive and most suitable for beginners.
There are mainly 2 types of fluorescent tubes: T8 (26 mm) and T5 (16 mm) tubes. There are also T2 tubes (7 mm) but they are rare. The number of tubes in a gallery can vary from 1 to 4 depending on the size of the aquarium. They offer powers ranging from 5 to 120 W.
In order to take full advantage of the power of your tubes, install reflectors to return all the light to the aquarium (exploitation of the power will be up to 4 times better!). Note that it is better to favour long tubes than their shorter equivalents (their performance is higher).
One of the main disadvantages of this solution is that the tubes get tired very quickly and that they must be changed regularly (every 6/8 months on average) even if they still work. If you have several tubes, change them in order not to cause an imbalance in the tank.
How to read the information on my aquarium neon?
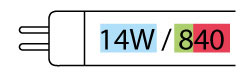
In blue: electrical power consumed in Watts (here 14W)
In green: number x 10 = colour rendering index - IRC (here 8 x 10 = 80)
In red: number x 1000 = colour temperature in Kelvin (here 40 x 1000 = 4000°K)HQI lamps
It's one of the best aquarium lighting solutions. Generally used for seawater aquariums, they can work very well for freshwater tanks.
The base remains the same as for HQL lamps: remove the lid of your aquarium, place them 30 cm or 12 inches from the surface, they turn on and off gradually too and if you have several lamps, change the bulbs one at the time to avoid imbalance in the aquarium.
On the other hand, their colour is much more pleasant than the HQL: between 6300°K and 11500°K. They are also more powerful and illuminate a larger surface. This makes it ideal for long aquariums. Their lifespan is around 15,000 hours.
Some disadvantages are however to note: these lamps are very heavy (30 kg or 66 pounds) and therefore require a good wall mounting. They give off a lot of heat which can be problematic for your aquarium in the summer, if it already has a tendency to heat up. They are also quite expensive.
We will opt for this type of lighting for large and deep aquariums.
LED lamps
It is one of the latest technologies in aquarium lighting. It is starting to become more and more popular because there are many advantages: low power consumption (-60% compared to the fluorescent tube for higher power), very long life (ignition and extinction without consequences on it), highly accurate colour rendering... LED lighting does not emit heat, unlike the HQI lamps mentioned above. In addition, the LED ramps can be fixed directly above the aquarium, which facilitates the use of this solution compared to the HQL and HQI lamps which requires a much larger installation.
On the other hand, this technology is quite expensive. Its price will, nevertheless, be depreciated upon use.
On the other hand, this technology is quite expensive. Its price will, nevertheless, be depreciated upon use.
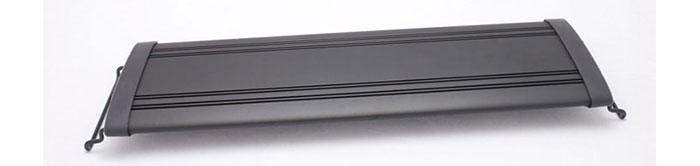
Example of a LED ramp to be installed directly on the aquarium
Some rules
The lighting should not exceed 12 hours a day, with an ideal at 10 hours a day. For the well-being of plants and fish, the lighting must be continuous, that means it must turn on and off once a day, and preferably gradually.
Heating
Although several species of fish can live in unheated aquarium (red fish, Danios...), you will need in most configurations a heating system.
Again, there are several solutions:
The immersion heater
This is the most common solution in aquariums. It consists of a thermostat and a heating resistor. It immerses itself completely in the water and is kept in the aquarium by suction cups. You can choose the desired temperature, and the immersion heater will turn on and off to keep this temperature constant. Some models have a protective grid to protect fish from burns (unnecessary in case of internal settling filter). For maximum efficiency, place it near a well-brewed area. Finally, if you have a large aquarium, do not hesitate to multiply the immersion heaters in different parts of your tank.
On the power side, count from 1 Watt (room heated to 18/19°C or 64/66°F) to 2 Watts (cold room to 13/14°C or 55/57°F) per liter of water (0.25 Gal).
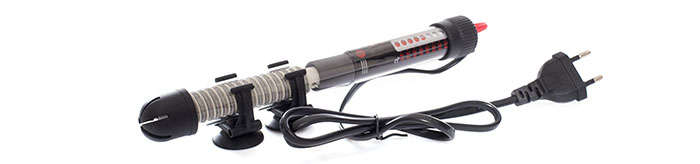
The immersion heater is the most common heating accessory
The heating cord
Used initially in vivariums, this solution has been extended to the aquarium hobby. This involves passing heating cables under the substrate. It thus uniformly heats the entire surface of the soil and promotes micro-currents of water in the substrate (beneficial for plants). It is therefore a more discreet and aesthetic solution than the immersion heater.
Here, 3 Watts per 10 liters (2.2 imp gal / 2.6 US gal) of water will be sufficient.
External heating
It is placed on the outlet pipes of the external filter (it can however slightly decrease the flow). It can go from 200 to 300 Watts. The advantage is that it does not take place in the aquarium and remains very discreet.
Options
The timer
It is placed between the power cable of the lighting and the electrical socket. The timer will automatically turn on and turn off your aquarium. Useful, no? In addition, it is a more stable solution than the manual ignition because there will be no variation in the duration of the lighting time.

Exemple of timer
The thermometer
In order to keep control of the temperature, it is good to put a thermometer. There are several types of thermometer: digital thermometer to be placed outside the aquarium, thermometer with probe, alcohol thermometer (glass tube with a red liquid) to fix inside the aquarium...

Exemple of thermometer
The C02 diffuser
The C02 diffusers make it possible to dissolve the CO2 in the water optimally by diffusing it into very fine bubbles. They will be used to promote the growth of delicate plants. This system will be set up in addition to a good substrate, good lighting and appropriate fertilisation.
It is also used to lower the pH or fight against algae.
Be careful, however, not to overdose the C02 which could then asphyxiate the animals.
The C02 diffuser is to be placed as far as possible from the brewing zone, and therefore from the filter. Indeed, the more peaceful the surface of the water, the higher the amount of CO2 remaining in the aquarium. It's about finding the right balance between the aeration of the aquarium and the retention of C02.
Bubbles or air pumps
As its name suggests, a bubbler will pump the ambient air to distribute it in your aquarium in the form of bubbles.
To be able to use it, it will be completed with a pipe and an air diffuser.
Today, its use is mainly aesthetic but is generally not recommended. Indeed, the bubbles introduced promote the elimination of Co2, essential for plant growth. The latter will then vegetate, and will not have the opportunity to flourish. Also be careful not to install your bubbler when starting your aquarium because the excess oxygen will limit the installation of good essential bacteria.
The air pump may be useful in some cases: lack of oxygen, high temperature in the summer, overcrowded aquarium...
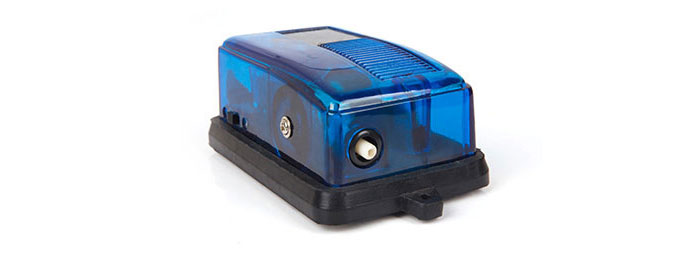
Exemple of air pumps
UV sterilisers
They are used in aquariums of sea water but some use them in aquarium of fresh water. They are used to eliminate the spores of algae and to prevent the proliferation of diseases by killing the pathogens that passes through it.
However, it cannot eliminate pathogens that remain in the aquarium, for example on fish or in the substrate. Thus, it will not cure miraculously your sick fish, but will limit the spread of the disease. As for algae, the steriliser will have no effect on the algae attached to the decoration but just on the spores suspended in the water.
To give you an example of use in fresh water, the aquarium stores use it, in the case where several bins are fed by a single filter: the UV steriliser prevents the spread of disease from one tank to another and ensures a certain level of safety.
You will soon understand, in the context of an aquarium for private use, its interest is very limited. Indeed, in a well-balanced tank, with a good filter, a good maintenance, not overpopulated and with fish in full health, the UV sterilisers have no use!
We recommend you to review your installation (lighting, feeding, planting, water parameters...) if you have problems with algae, rather than using a steriliser. As for diseases, it is better to isolate the sick fish to facilitate its treatment and prevent the spread of pathogens.
Note that the installation of a steriliser is quite delicate, and they should not be used continuously (they also destroy the trace elements essential for the growth of plants and good filter bacteria). They also eliminate the drugs. Their use is therefore reserved for experts who will use it sparingly in fresh water: after treatment or death of a fish, in case of invasion of seaweed, introduction of a new root... it is an important investment for a rather occasional use!
Chillers
As their name suggests, they serve to lower the temperature of the aquarium. They can be useful in the hottest regions during periods of heat wave, especially for cold water fish. They are however quite expensive: one can try other means before having recourse to this solution.
Denitrators
This is a complementary filter to rid the aquarium of nitrates. However, in fresh water, in a well-planted tank and with appropriate water changes, you can do without this equipment. It is also to handle with care and therefore remains quite controversial. It is advisable to be cautious about its use. A safer alternative: anti-nitrate resins!
The installation steps
See the steps
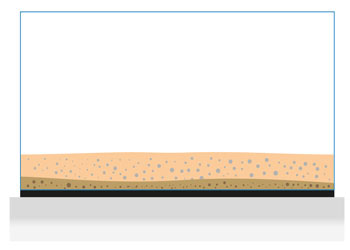
1. Wash the tank with clean water using a soft cloth to remove dust (use of detergents is prohibited!)
2. Wash the gravel/sand very carefully with clean water (until the water is clean) to get rid of any dust or harmful substances
3. Install your aquarium and possibly your furniture at the chosen place (to choose the right place, see "general advice"). Remember to clean the bearing surface of the tank and do not even leave a grain of sand. Make sure that it is straight with a level and also install the foam mat between the support and the tank
4. If you opted for heating cords, now it is the time to install them!
5. If necessary, install the nutritive soil (aquarium potting soil) with a 3 to 5 cm (1.2 to 2 inches) of layer over the entire soil surface
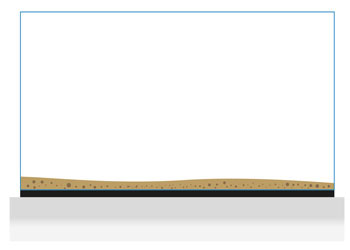
6. Cover it with gravel or sand previously rinsed
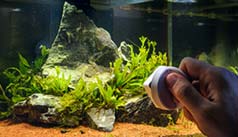
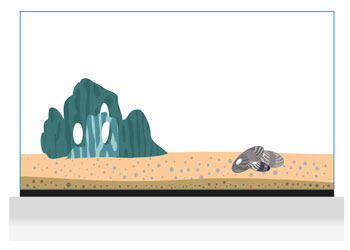
7. Proceed with the installation of the decoration: rocks, roots... Pay attention to the stability of your arrangement (if necessary, stick the elements between them)!
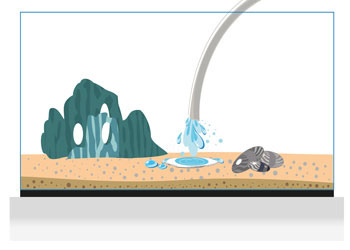
8. Place a plate or bowl on the gravel and start pouring water gently on the plate to fill the aquarium (this will prevent the formation of holes during the filling). You can stop when the aquarium is 1/3 filled
9. Install your technical equipment: filter, heating system, thermometer, C02 diffuser, etc... without connecting them!
10. Plant your plants gently. Space them sufficiently between them, because they will grow, and do not push them too much in the substratum because they might rot.
To choose your plants and their locations, consult our nos fiches de freshwater plant maintenance sheets!
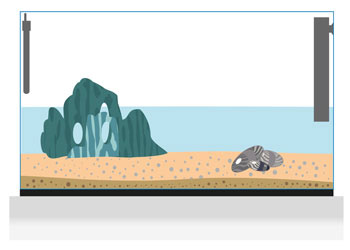
11. Finish filling
12. Plug in the equipment and check that everything is working
13. Let your aquarium run for 3 to 4 weeks in order for the nitrogen cycle to get in place and so the natural nitrite peak at startup has passed. After this period, you can then perform various tests on the water (pH, KH, NO2...) to see if your tank is ready! (You can go to the store to do these tests for free)
14. Is your aquarium ready to welcome its first inhabitants? Congratulations!
Introduce your fish gradually to avoid a nitrite peak. Your ecosystem will slowly adapt to manage the presence of your fish!
To choose your fish, first consider their needs. To do this, consult our maintenance sheets for freshwater fish!
Reminders about useful calculations
See calculations
Approximate weight of an aquarium:
Tank volume x 1,5
(for example, for an aquarium of 120 liters (26 imp gal / 32 US gal), weight estimated at 120x1.5 = 180 kg (400 pounds))
Brewing power of a filter:
Tank volume x3, x4 or x5 according to your population
(for example, for an aquarium of 120 liters (26 imp gal / 32 US gal), the flow of the pump should be between 360 and 600 liters/hour (95 and 158.5 gal/hour) )
Lighting power:
1 Watt or 2 liters (0.5 Gal) of water
20 to 35 Lumens for 1 liter (0.25 Gal)
(for example, for a 120 liters (26 imp gal / 32 US gal) aquarium, the gallery will provide at least 60 Watts)
Heating:
Pièce chauffée à 18/19 °C = 1 Watt par litre d'eau
Room heated at 18/19°C (65°F) = 1 Watt per liter (0.25 Gal) of water
Room heated at 15/17°C (60°F) = 1.5 Watt per liter (0.25 Gal) of water
(for example, for a 120 liters (26 imp gal / 32 US gal) aquarium placed in a room heated to 18°C, the heating will be at least 120x1 = 120 Watts)
